I finished stitching this canvas last year, but I am so terrified of ruining a canvas by cutting into it, which is a requirement of finishing, I think there are multiple parts to that fear, the actual monetary cost of the canvas and threads, and then the labour cost of the time spent stitching. So by the time I finish a canvas it sits for months.
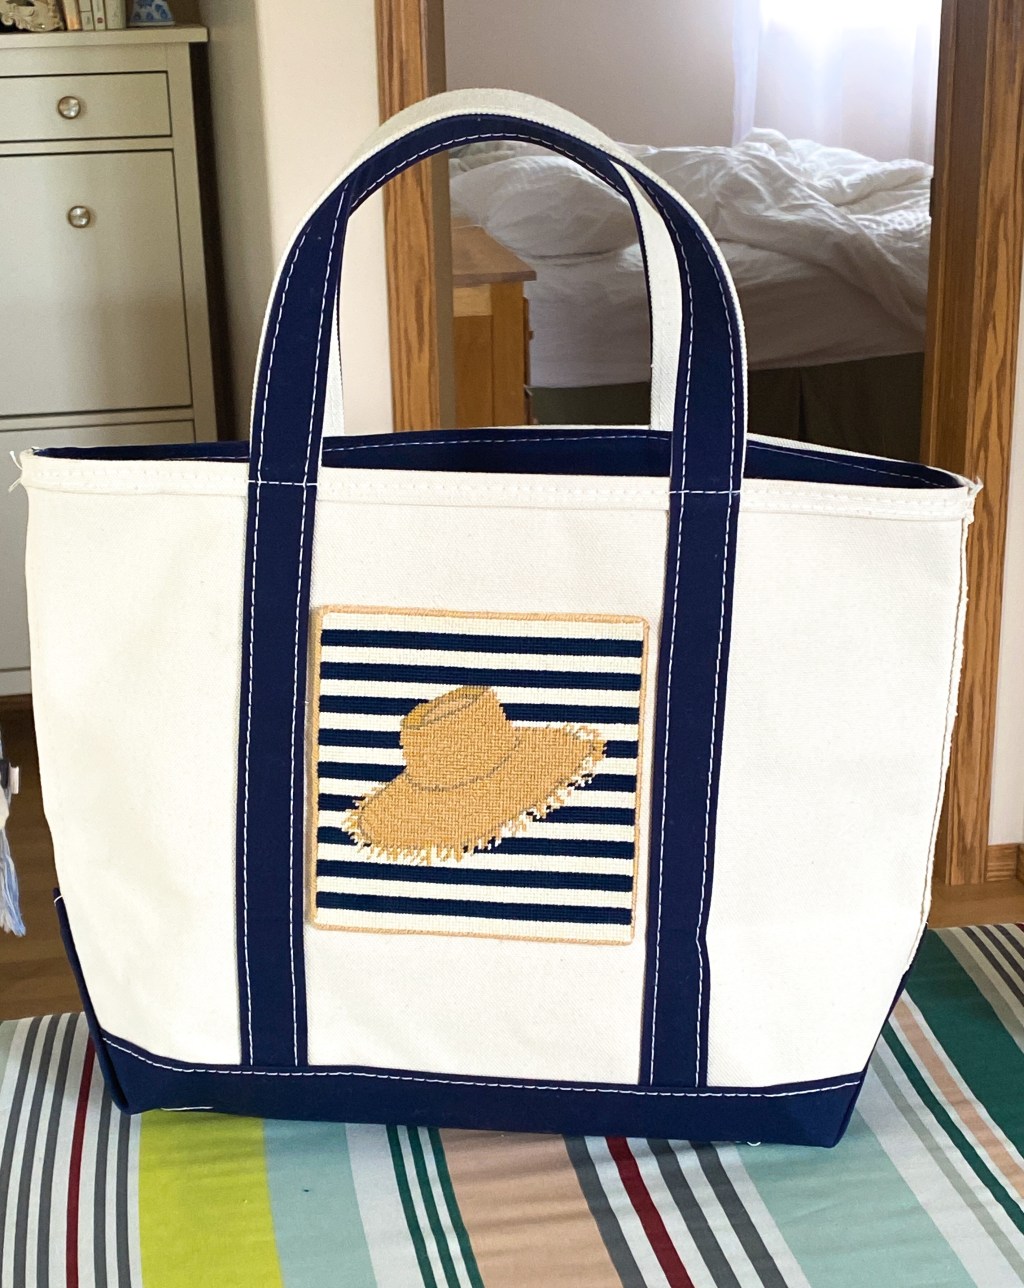
I was also very nervous that it wasn’t going to fit in between the two handles of the L.L. Bean Boat Tote that I had always envisioned it finished on. But it fits perfectly, and this has become my favorite summer bag for summer 2022.
Materials:
Canvas: Pip and Roo Needleworks Straw Beach Hat
Threads: Silk and Ivory in 010 Classic Navy, 060 Ginger, 064 Curry, and171 Whipped Cream, I would encourage you to shop your local shop for threads, but if like me you don’t have a local shop, these links will take you to KCNeedlepoint who ship nearly everywhere.
Thread to bind your edges, can be a thread you already used or a contrasting colour.
Scissors.
Bag to attach pin. I am using an L.L. Bean Boat Tote, I got the regular length handles, but I wish I had gotten the long (I bought my bag in store and they only had the medium in regular and it didn’t actually say on the label which one it was).
Needlepoint needle. This is an 18-count canvas so a size 24 needle is best, you can get needles at any fabric store and a lot of needlepoint companies and designers include a needle in your order.
Stretcher bars and pins. These are not necessary, some people hate them, but I love them. I got mine from Amazon.
Pins. I use a combo of the flat pins that I use on my stretcher bars and regular sewing pins.
Sturdy surface for blocking on. I use my ironing board, some people use plywood/wood, some have self-healing boards.
Iron.
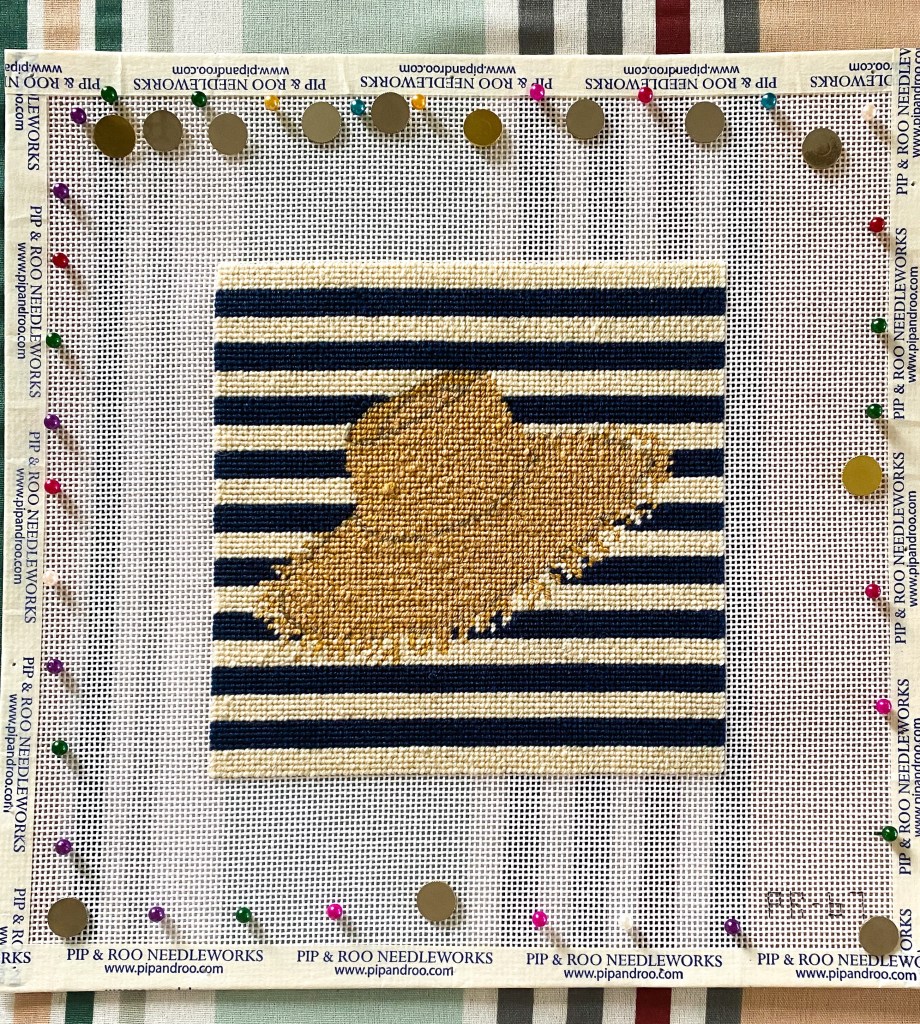
The first step to any good finish is blocking your completely stitched item. I followed a different tutorial this time than last time and I think it would be good for an item that was very not square. I always stitch in a frame rather than “in hand” (when you don’t use stretcher bars) and that helps to reduce the amount of stretching that you do as you stitch. Using stretcher bars doesn’t completely eliminate the need for blocking (especially on something with straight lines on it like this), but it does really help.

Once you have left your blocked canvas to cool/dry completely and it is sturdy in it’s new shape you can remove the pins and trim your canvas (if you, like me, use one pair of scissors for everything, wash and dry your scissors before bringing them near your canvas). I left about half an inch of room here, about 6 or 7 empty rows. I also folded them back to form them to the shape that they would be bound into.
You should also cut out some of the corners, I didn’t realize this until I had already done the binding stitch on one corner and I don’t know if I did it properly, but you want to cut closer in the corners where you will have many layers of folded over canvas. You can make notches, cut out a little square from each corner, whatever feels best to you.
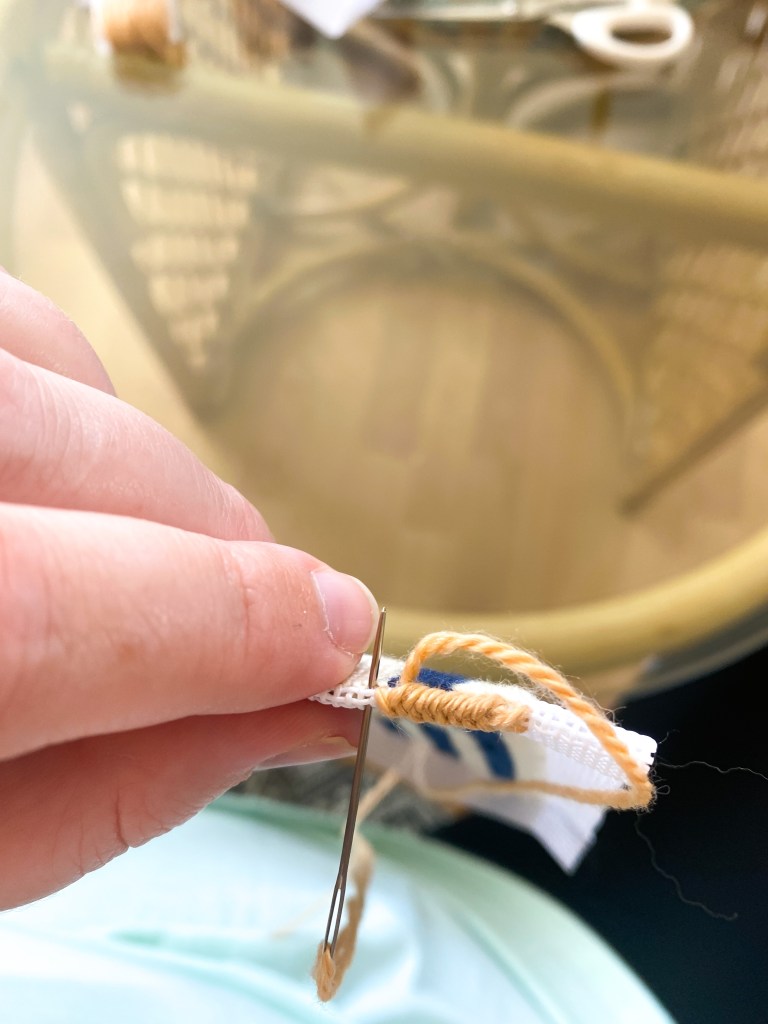
The next step is binding the edges, so because you have cut into your canvas, it can now unravel with time. So the binding stitch is to prevent the canvas from unravelling in a way that your stitching can come undone, and it provides a nice finished edge for your patch.
I was so torn for colour of the binding stitch, I ended up going with one of the hat threads. I was initially leaning towards this red wool I had in my kit as a leftover, but it was too thick to pull through the canvas, so I kept with this Silk and Ivory thread.
This is the tutorial I followed, it is much easier to see this stitch than describe it, but once you get the hang of it it is so easy. The hardest part is getting around the corners, if you look closely at the picture below you can see that they are a bit rough, but not bad. I don’t have any tips, just that you may have to go over areas a couple times to get everything tacked down.
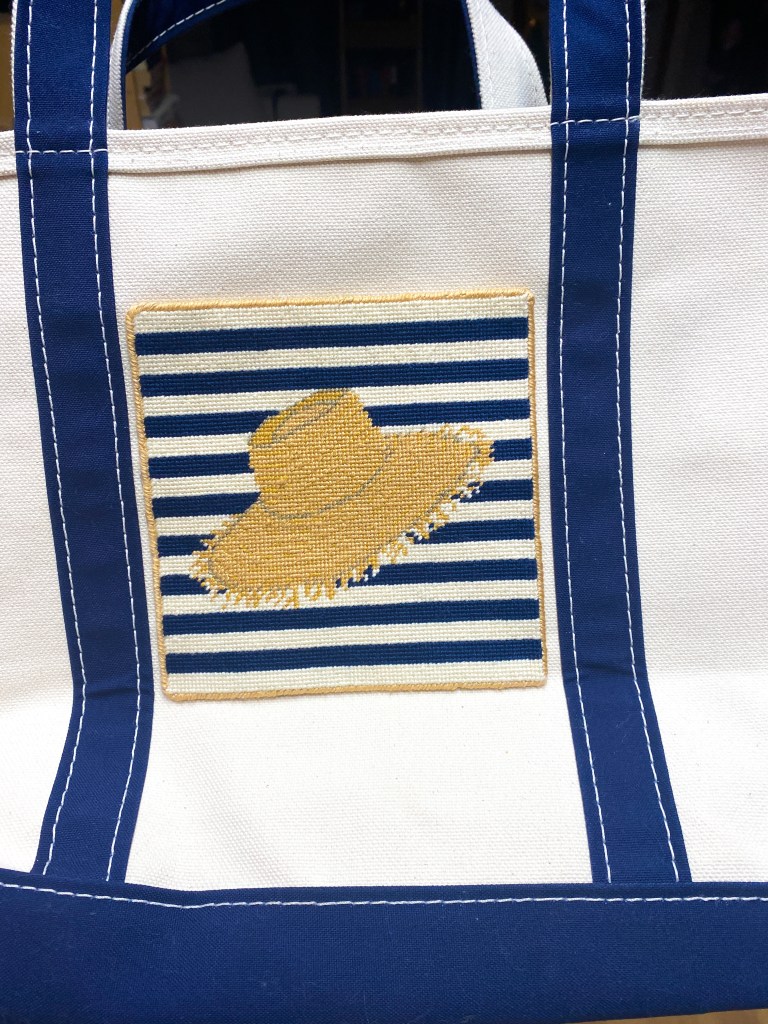
Then this is the controversial part of this finish. I used hot glue to stick it to the bag. I do not own a sewing machine and I definitely would not feel comfortable sewing through a thick needlepoint and a thick canvas tote. I can’t even imagine how difficult that would be. So I hot glued it on.
On the backside of the canvas after you have finished the binding stitch there is a bit of “bare” canvas, canvas with no stitching on it, overlapped with the back of the stitched canvas. That is the only area I put the glue, no glue was applied directly to the threads. And then for extra security I folded the bag down flat and set a stack of books down on it and left it overnight.
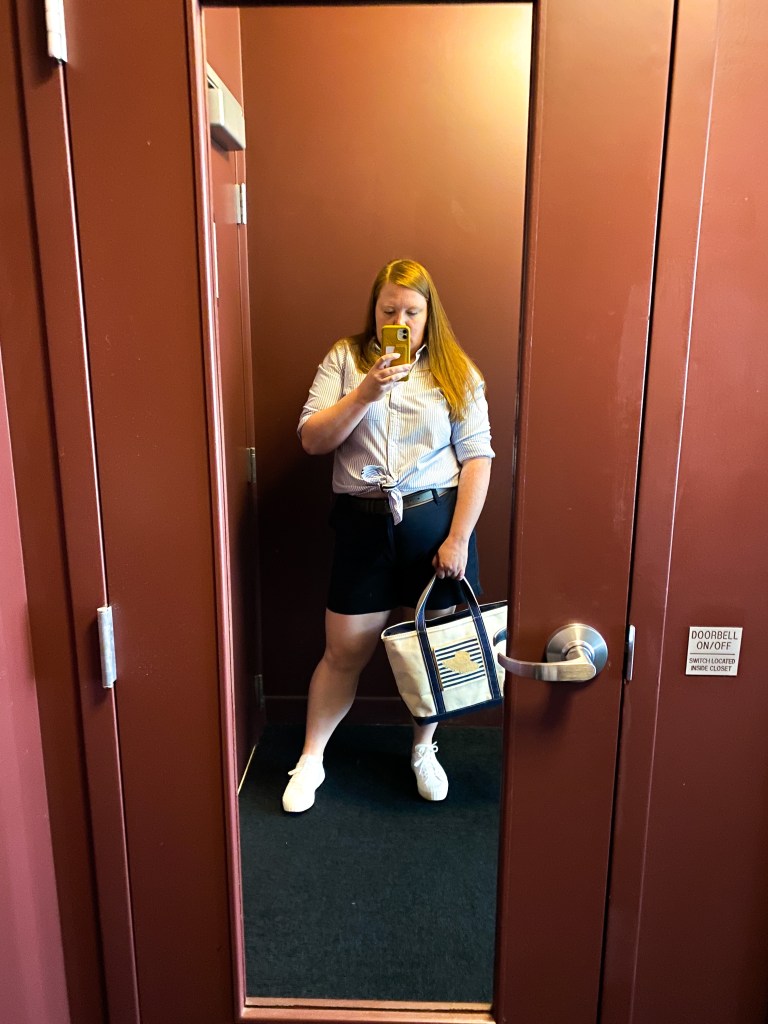
And here is is on it’s first outing! It’s held up really well so far and I am so pleased with how it turned out!
Laura


2 responses to “Needlepoint Notes: Bag Patch Self-Finishing”
[…] I’ve been using my needlepoint tote bag (post on how I finished it) as a tennis bag for the past couple summers, but this monogrammed bag with an actual racket pocket […]
LikeLike
Transform your bag into a personalized masterpiece by adding carefully curated patches, reflecting your unique style on the go. visit to our website https://roshanmudan.com/
LikeLike