So I’ve been needlepointing for over a year now but I haven’t been doing a lot of finishing. Just stitching, putting it in a bag (or running out of thread and putting it in a separate bag until I get my shit together enough to order thread). Part of it is that I haven’t found a finisher in Canada, I’m really scared to mail a finished canvas, and finishing is so permanent. If you don’t like the way it is finished, that’s it. It is like that forever.
Side note: I’m in the middle of buying a new-to-me car and I think I’m realizing I have problems with commitment. I can’t finish a needlepoint, I can’t pick a car. Moving on before I spiral into that realization.

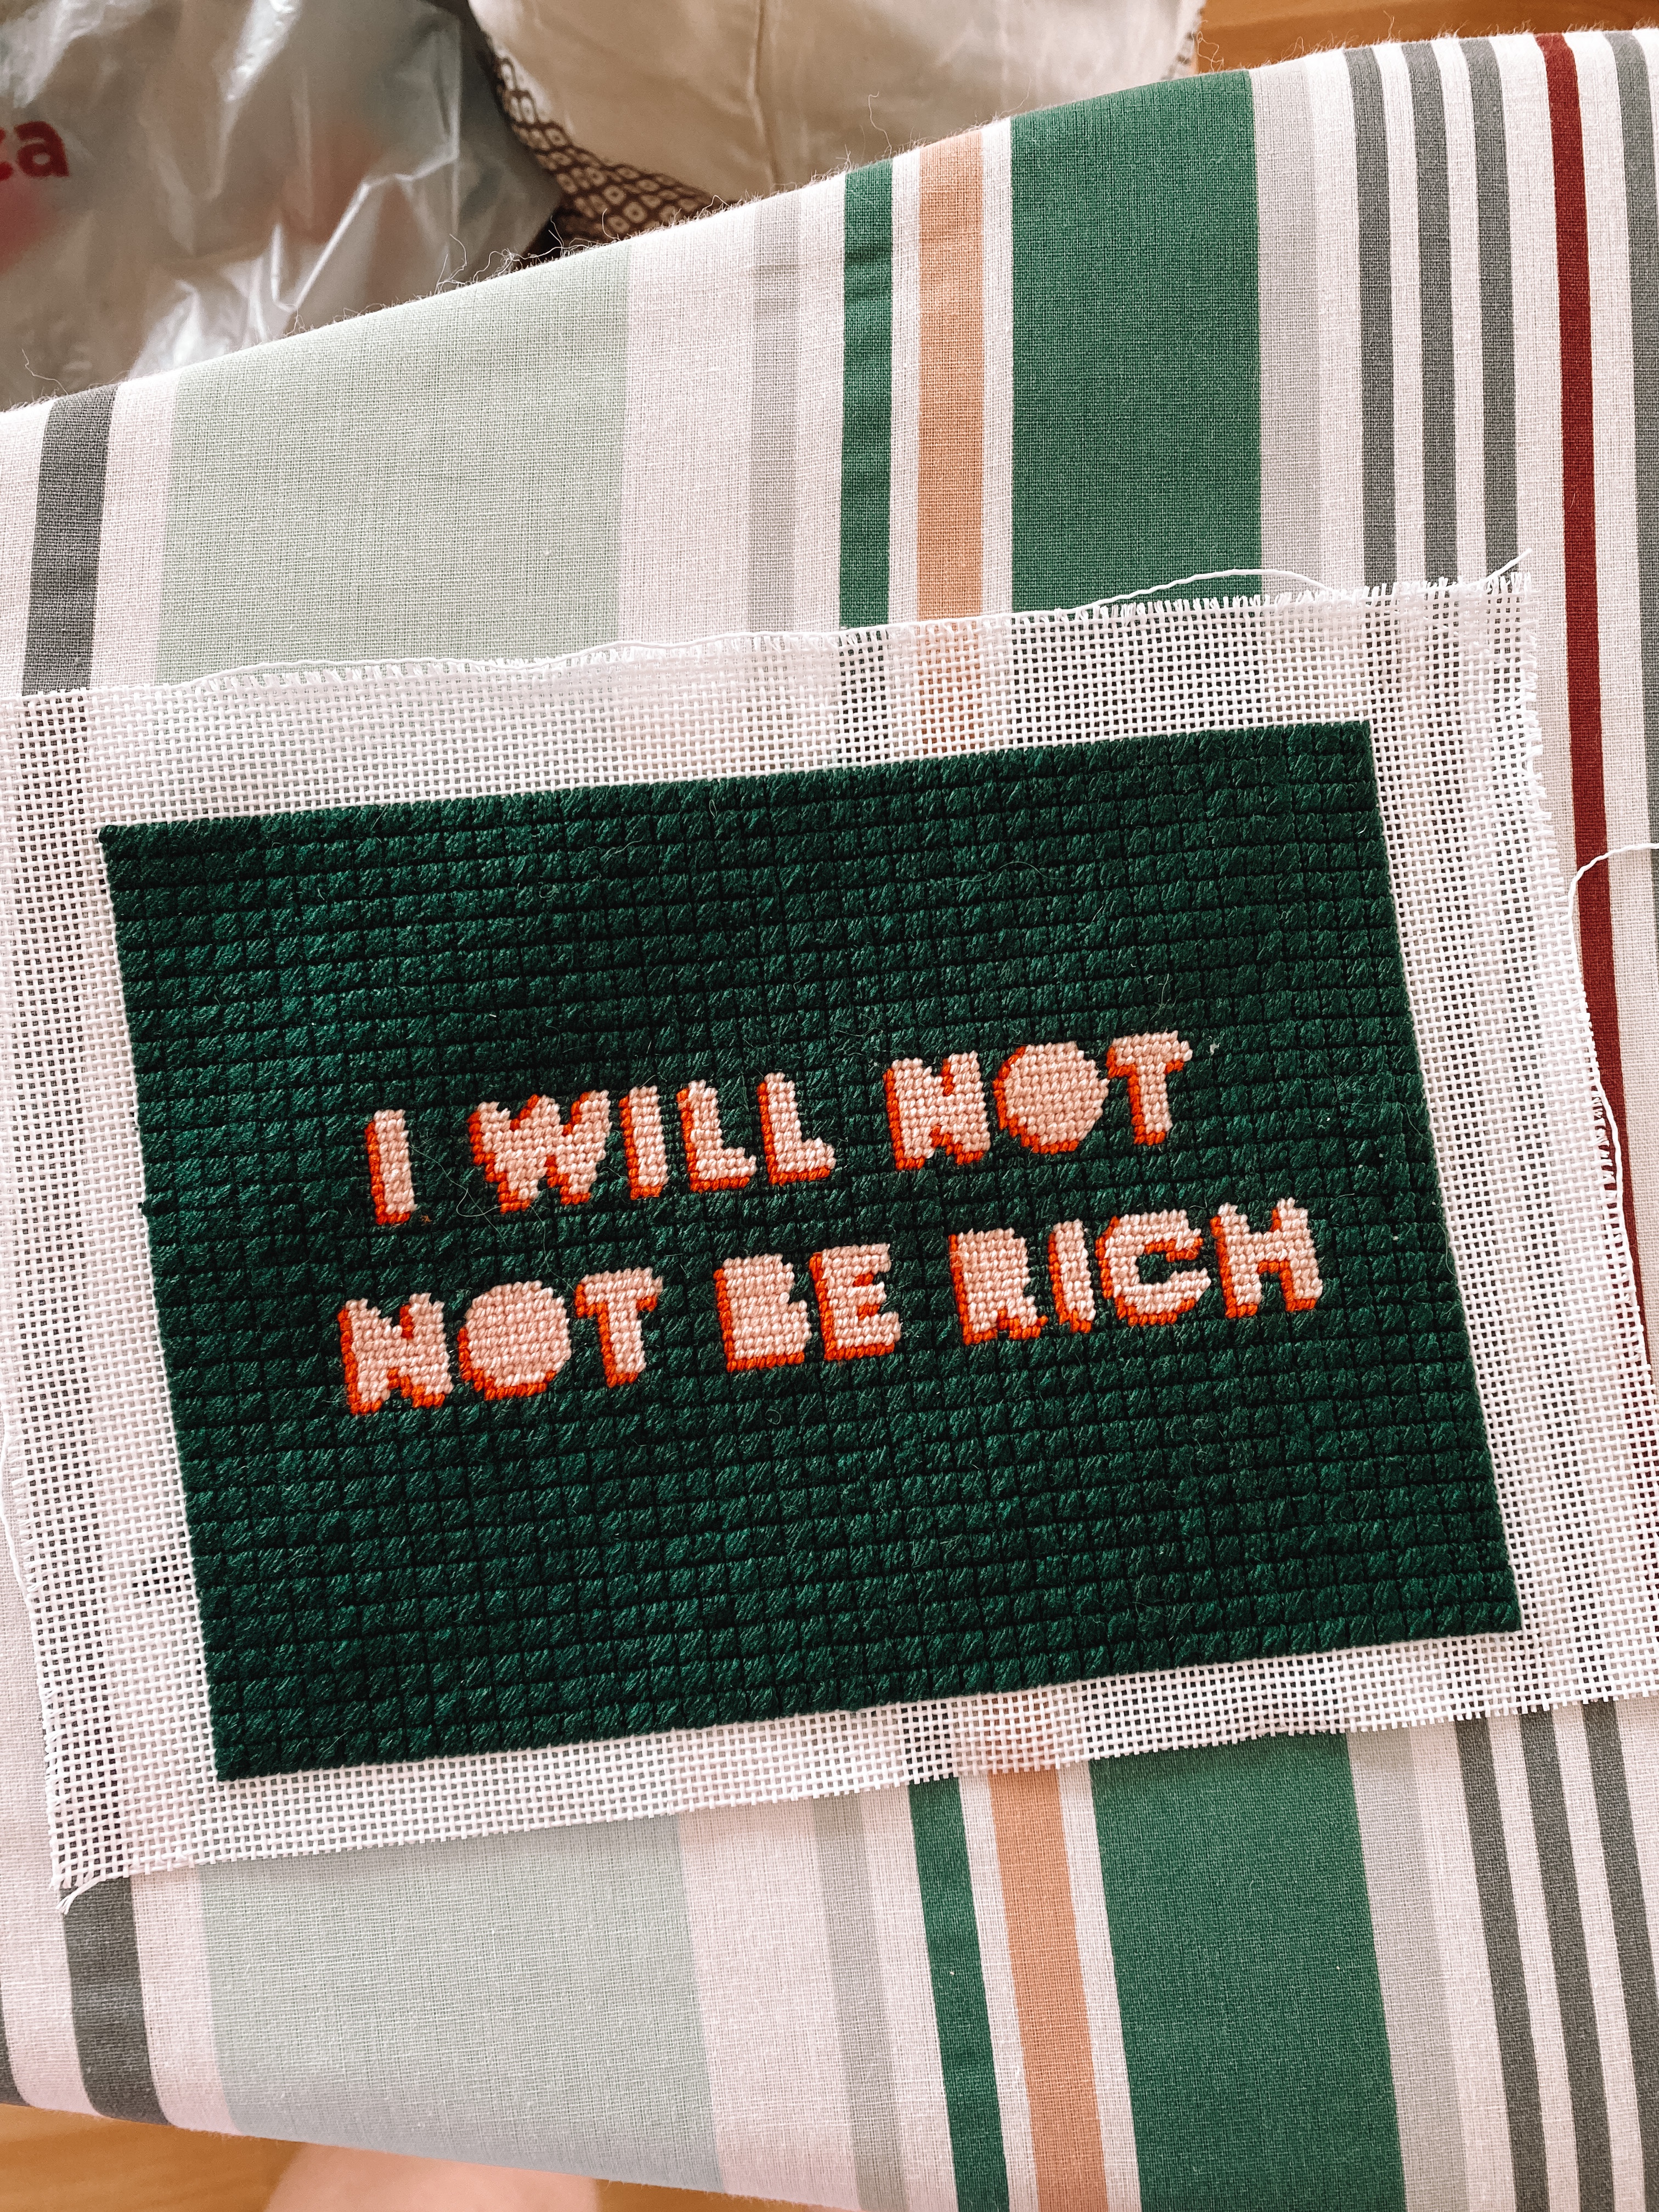
The canvas is from Eva Howard Designs and I got it kitted (meaning it came with a needle and threads). I ordered direct from the designer and from what I have seen designers kit for the canvas to be stitched the way they designed it, the way they see it. If you would like to switch the colours or something I would suggest ordering just the canvas, or seeing if you can buy the canvas kitted through a LNS (local needlepoint shop) and customize the colours in your kit. Link to canvas, link to kit. It came kitted with Pepper Pot silk, which I think is my favourite fiber.
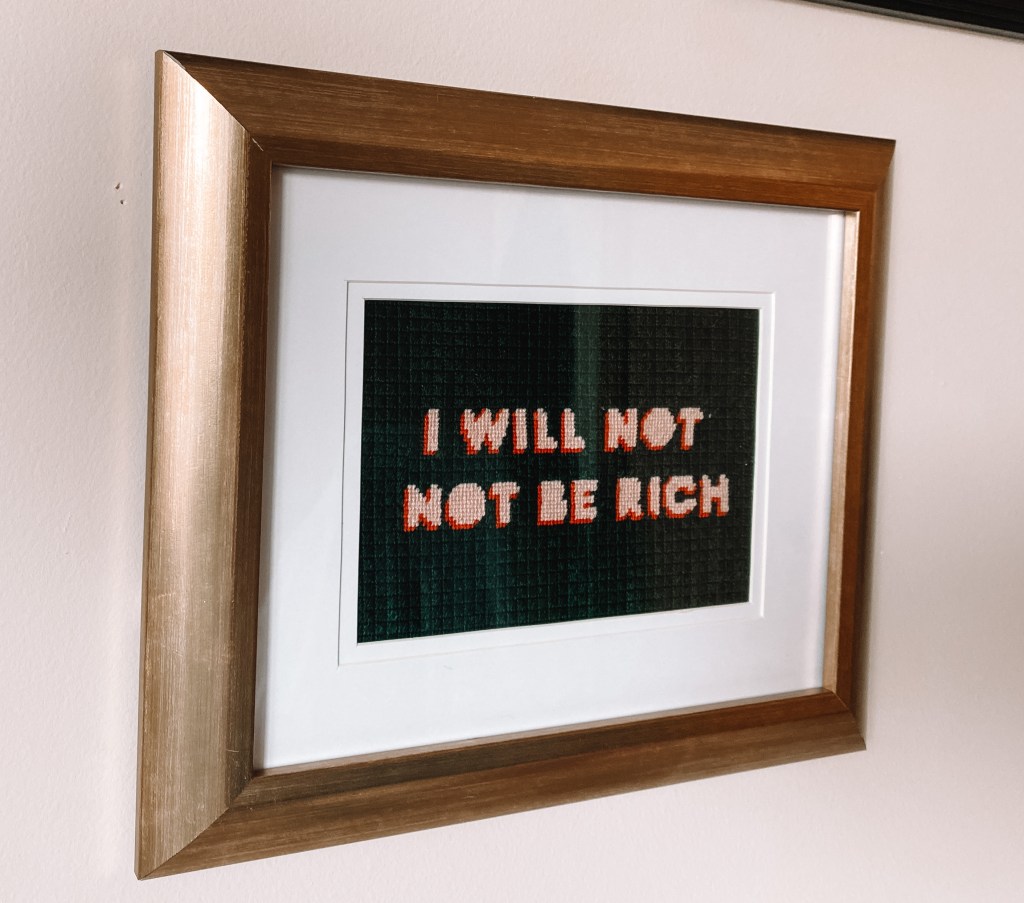
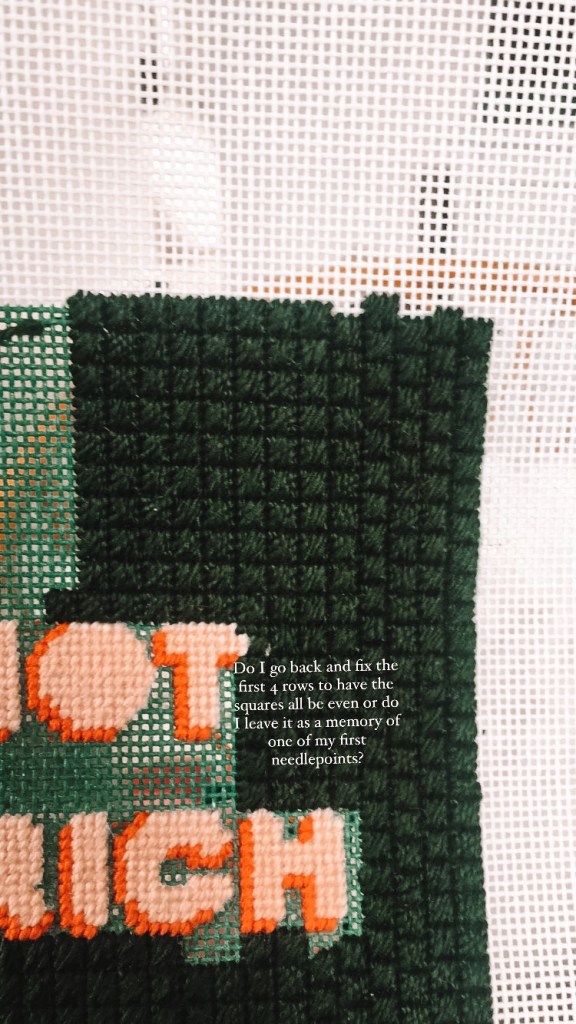
But when I went to Thunder Bay in July I knew I wanted to get a frame to finish the second canvas I had ever stitched. This canvas is special because It was the canvas that got me through my surgery recovery last October, was the first time I tried a stitch beyond a tent stitch, and the first time I ever frogged something (badly, I ripped through the canvas in one section and that made it complicated to finish. I did a Scotch stitch, which is like these little boxes, and the rip in the canvas is right along the edge of two columns of boxes which means that I couldn’t pull on it too much or the rip in the canvas would probably split apart and maybe rip further. To me, this limited my finishing options to framing.
A crucial part to a professional looking finishing job is making sure your canvas is square. If you stitch “in hand” your canvas is likely to get quite warped and bent, canvases can also warp slightly even if you use a frame. To make your canvas straight and square again you need to block it. I followed SBT Stitches YouTube tutorial to block this canvas. What I liked about this method is that it didn’t involve spraying water directly onto the canvas (I was worried that the dark green background would bleed into the light pink letters), and she wasn’t using anything fancy in her materials. No blocking boards or any specific materials just an iron, a cloth you can get wet, pins, and some surface you can pin it onto overnight/ for an extended period of time. I’ve seen people on Instagram use couch arms, but I used my ironing board and I think it worked out great! I suppose that the advantage of a blocking board is that there are gridlines on it so you can check how square it is, but my ironing board cover has stripes on it that I’m pretty sure are straight that I attempted to use to line it up.
What made me the most nervous about blocking this canvas was the aforementioned tear in my canvas, you have to pull on the canvas pretty hard to get it straight and I was super nervous about pulling the rip. But I did put it in the frame before to check and see if I really needed to block it, but it did not look good and I’m really glad I took the risk and blocked it because it looks way better.

To frame it, I had already cut into the canvas, because I thought I would have to to put it in the frame, which then meant it was too small to not slide down in the frame. So I centered it over the image on the stock filler photo that came in the frame and used masking tape (this probably isn’t the best for “archival” purposes, the scrapbooker buried deep down inside me was screaming about acid-free!!!). and then popped it in the frame and hung it using the 3M velcro things, because I hate filling in holes when I move.


Cutting into a canvas and getting it wet after stitching it is really nerve-wracking. But I’m really trying to get past being too precious with needlepoint, what is the point of stitching these things, with the intention of displaying them, and then putting them in a bag, out of sight. When I was in Michaels in TBay I also bought some of the materials for finishing canvases as ornaments, although I couldn’t find acid-free board, so I’m stuck on that for now, but I do plan on stitching something in a simple circle soon so that I can learn to finish ornaments next!

I’m now working up the courage to finish a canvas as a patch or finish a couple ornaments/hangers. Keep your fingers crossed for me!
Laura


One response to “Needlepoint Self-Finishing: Framing”
[…] another needlepoint instead of just letting it sit in a ziploc bag. You can see the details on this blog post. Smoky sky sunsets I finally have a proper handle on my great-granny’s soda bread recipe and […]
LikeLike